
Sometimes you may want a Google Form to show different questions depending on how someone answers.
For example, one answer might send the user to a follow-up question, while another might allow them to skip ahead or finish the form.
Google Forms lets you do this using sections and the Go to section based on answer option. In this tutorial, I’ll show you how to set it up so your form can guide users to different questions based on the answers they select.
Things to Know
- This option is only available for multiple choice and drop-down questions.
- Sections for each option will need to be created first so each answer can be properly mapped.
- There will be a back button, so users can go back and change or review their answer if needed.
When Would You Use This in Google Forms?
Below are some examples of forms that would work well with this functionality, with examples of the different branches based on answers provided.
- Event RSVP
- Will you attend? Yes / No
- Yes → ask meal preference or guest count
- No → skip to the end
- Customer Support Form
- What do you need help with? Billing / Technical Issue / Account Access
- Each answer → sends the user to a different set of questions
- Product Interest Form
- Which product are you interested in? Product A / Product B / Product C
- Each choice → shows questions specific to that product
- Training or Workshop Registration
- Which session would you like to attend?
- Each answer → sends the user to details or follow-up questions for that session
- Employee Equipment Request
- What do you need? Laptop / Monitor / Software / Other
- Each option → asks different follow-up questions
- Appointment Request
- What type of appointment do you need? Consultation / Support / Follow-up
- Each choice → leads to different questions
- Website Contact Form
- Why are you contacting us? Sales / Support / General Question
- Each answer → sends the user to a different section
- Simple Quiz or Knowledge Check
- Ask a multiple-choice question
- Correct answer → move forward
- Incorrect answer → show an explanation or additional information
- Volunteer Signup
- How would you like to help? Event setup / Registration / Food service
- Each option → asks availability or experience questions relevant to that role
Try an Example RSVP Form
Want to see how this works before creating your own form?
I created a simple RSVP form that uses different sections based on the answer selected. Click through the example to see how choosing one response can lead to additional questions, while another response can skip ahead to the end of the form.
Video Tutorial
Step-by-Step Instructions
Remember: This functionality only works for multiple choice or drop-down questions.
Step 1: Create your form
Google Forms can be created from your Google Drive or the Google Forms page.
Google Drive
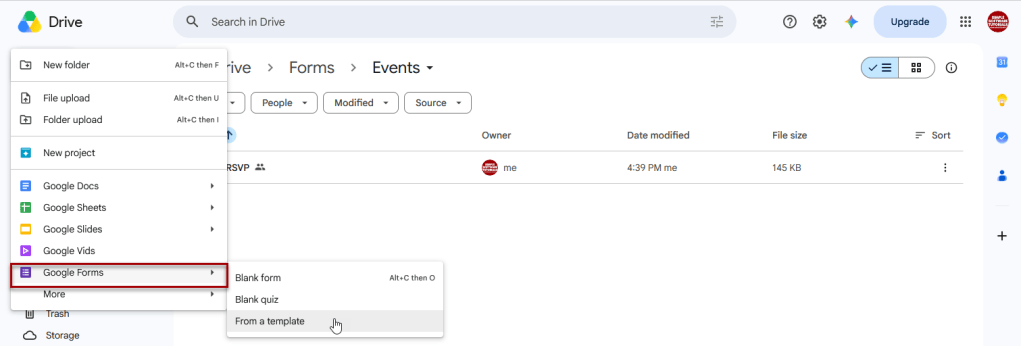
From your Google Drive, click on +New then hover over Google Forms and choose to create a blank form, blank quiz, or use a template.
Google Forms Page
Navigate to https://docs.google.com/forms and create new form using a template or a blank form.

Step 2: Create sections
Sections work like different pages in your form: when you set up this conditional logic to send a person to a specific next question based on their answer to the current question, they will be sent to a section containing the content you choose.
To do this, click the Add section icon (two stacked rectangles) on the right side menu to split your form into distinct pages.
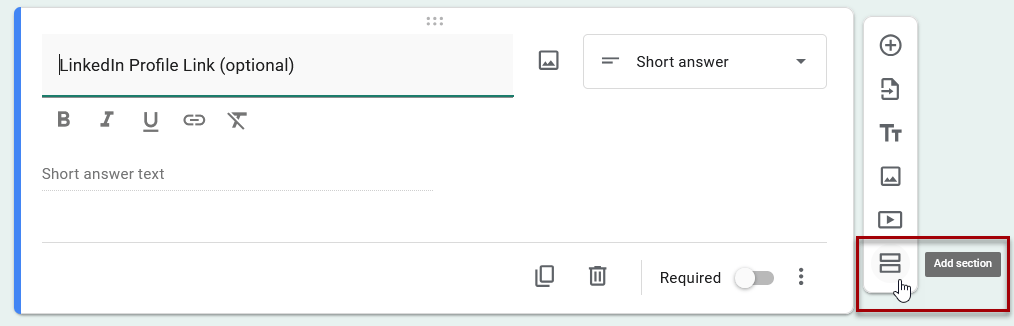
Create a section for each option. For example, if your question has 3 options that will send the person to a different option, you will need to create 3 sections – one for each option.
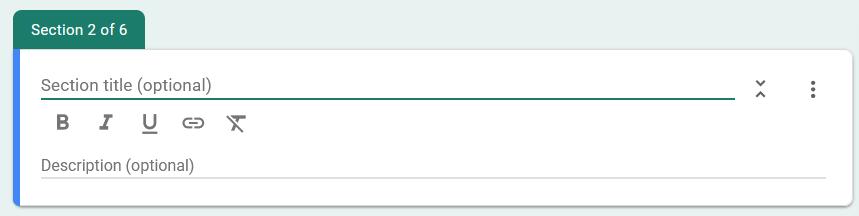
Tip: Although it’s optional to add a section title, I highly recommend doing so because that makes it so much easier to correctly match each answer to the correct section. Please note the title will be visible to anyone viewing the form, so ensure it is logical and viewer-friendly.
Step 3: Enable routing
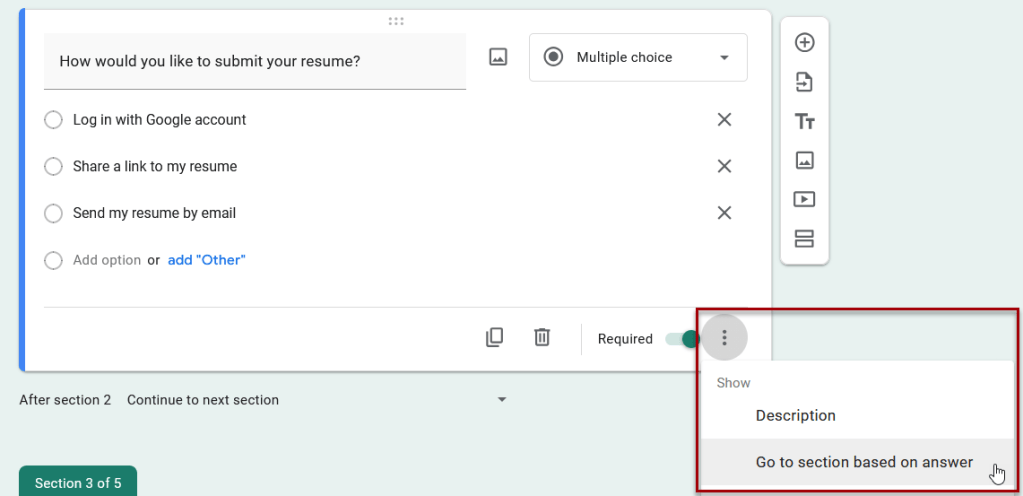
Click the three-dot menu at the bottom right of that question and select Go to section based on answer. This will open the mapping options for each answer.
Step 4: Map the choices
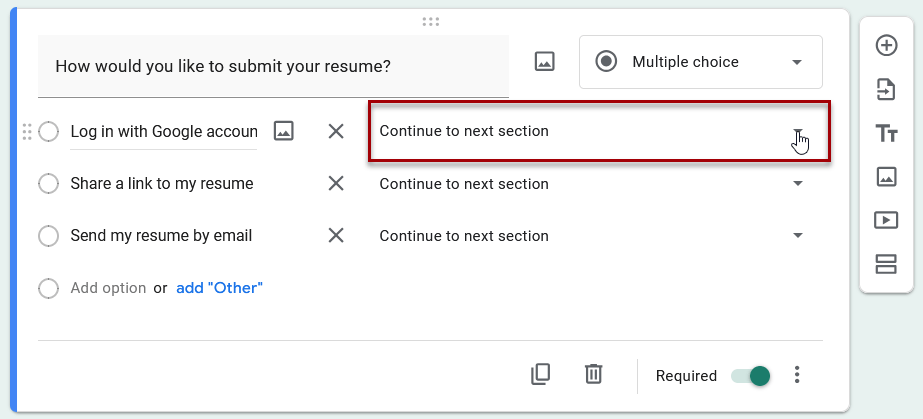
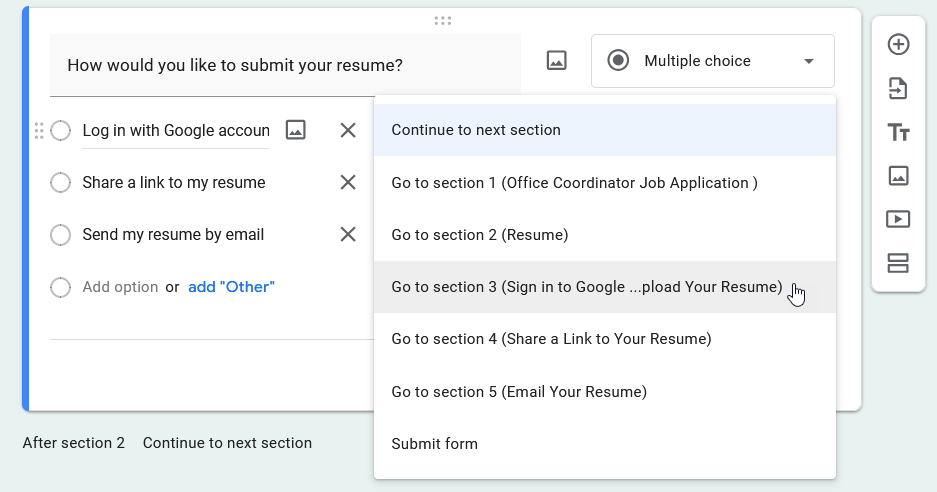
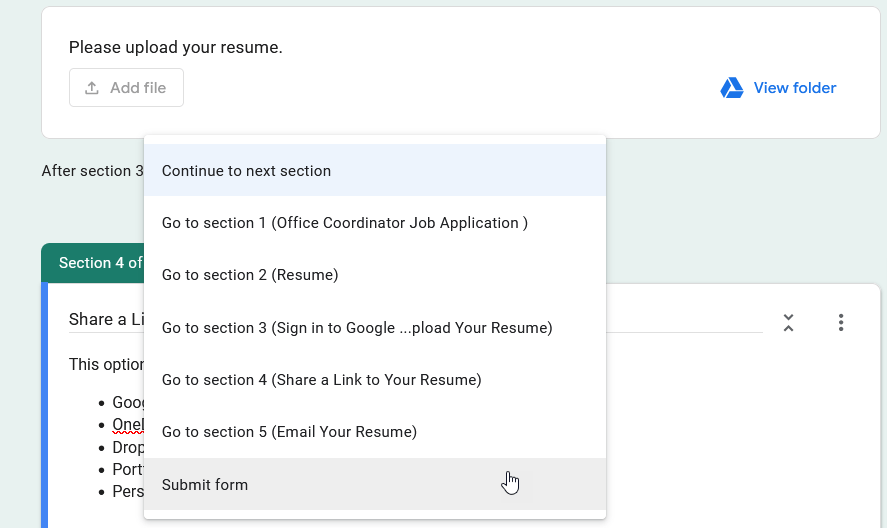
Use the drop-down menu next to each answer choice to select the exact section where that answer should lead. The section titles will be listed in parentheses so this is why it’s helpful to provide a section title that aligns with each answer.
Step 5: Manage the end of sections
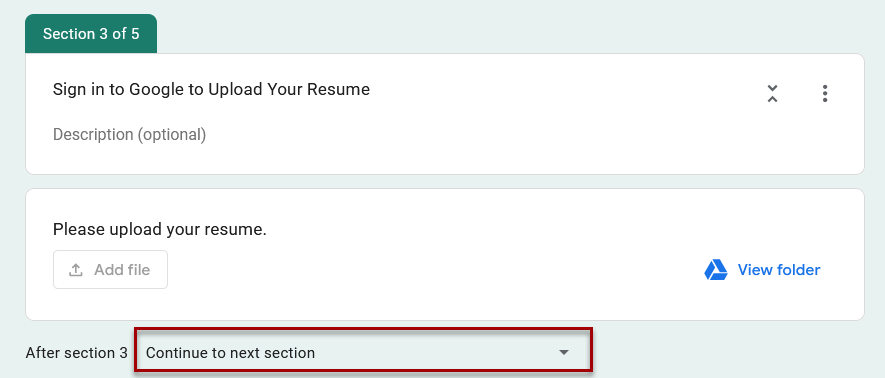
Check the bottom of each intermediate section to ensure it points to the final submission or skips remaining irrelevant sections properly.
Step 6: Test your form
Before publishing, it’s always a good idea to test your form to ensure it functions as expected and that the navigation goes where you want it to go.
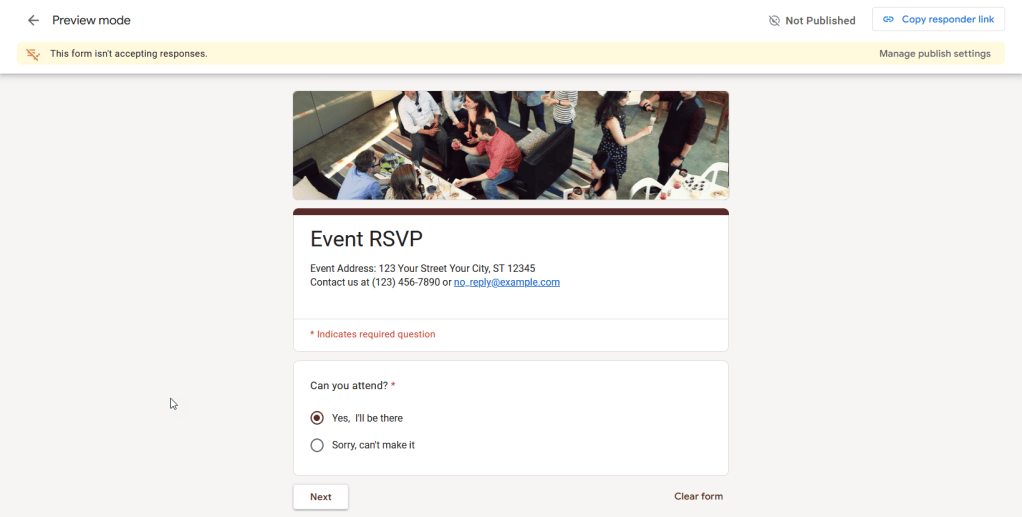
To do this, click on the preview icon above your form to open a preview version of your form.

Then test the different answers to ensure each answer goes where it should and that the form looks and functions as expected. If anything needs adjusting, you can leave preview mode and update your form as needed.
Step 6: Publish and share your form
One your form has been tested and is ready to go, you can publish it by clicking the Publish button on the top right of the page.

Related

How to Create a Google Form That Automatically Saves Responses to Google Sheets
Learn how to create a Google Form that automatically saves every response to Google Sheets. This tutorial shows how to build a form, connect it to a spreadsheet, customize settings, test submissions, and organize your data for analysis, reporting, or future projects.
Stay Updated
There are two easy ways to get notified when new tutorials are published:
Subscribe on YouTube for new video tutorials: @SimpleSoftwareTutorials
or enter your email below to receive new blog posts directly in your inbox:

