
Microsoft Word uses one-inch margins by default, but if you regularly use a different margin size, you can change the default so you don’t have to adjust it every time you create a new document.
This is especially useful if you frequently work with documents that require the same custom formatting.
Compatibility note: This tutorial was originally demonstrated using Word 2016, but the method is still applicable in current desktop versions of Microsoft Word, including Microsoft 365 and Word 2024. The interface may look slightly different depending on your version.
Video Tutorial
How to Change the Default Margins in Word
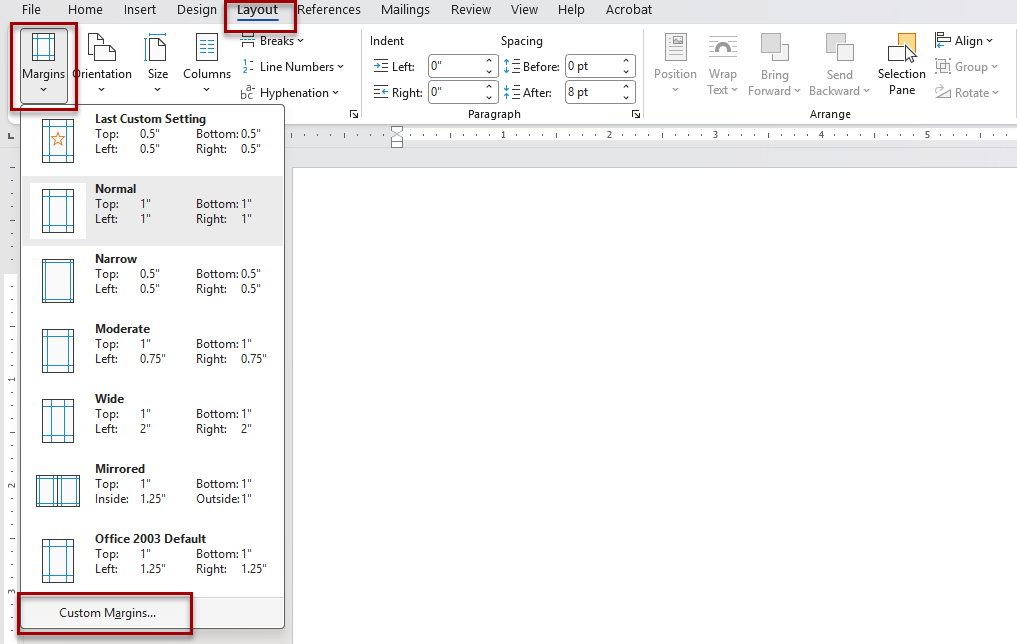
- Open Microsoft Word and select the Layout tab.
- Click Margins.
- At the bottom of the menu, select Custom Margins.
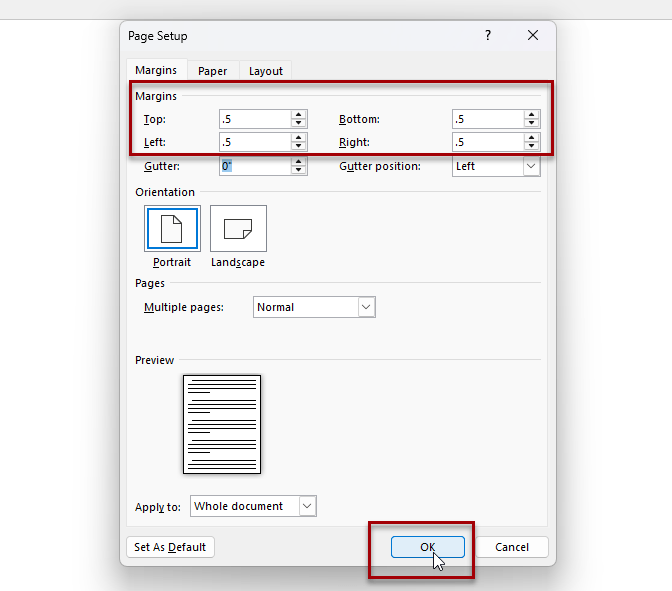
- Enter the margin sizes you want for the Top, Bottom, Left, and Right sides of the page.
- Click Set As Default.
- Word will ask whether you want to change the default settings for documents based on the Normal template. Click Yes to confirm.
Your selected margins will now be used automatically when you create new blank Word documents.
How to Restore the Default One-Inch Margins
If you decide later that you want to return to Word’s standard one-inch margins:
- Go to Layout > Margins.
- Select Normal to apply one-inch margins to the current document.
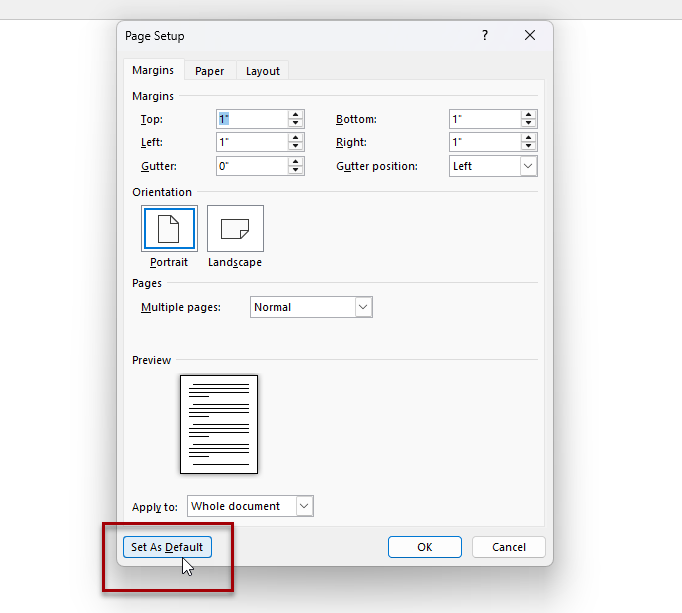
- Open Margins > Custom Margins.
- Click Set As Default.
- Click Yes to confirm the change.
New blank documents will once again use one-inch margins.
A Note About Word for the Web
You can change the margins of an individual document in Word for the web, but setting custom margins as the default for future documents requires the desktop version of Microsoft Word.
Related
Microsoft Word Basics: Features, Tools, and Functions Explained
Get familiar with Microsoft Word and learn what its most common tools and features do. This guide explains Word’s main tabs, formatting options, styles, tables, images, page layout tools, headers and footers, saving files, and more, with a guided video walkthrough and detailed training manual for additional help.
How to Insert a Horizontal Line Across the Page in Word (3 Easy Methods)
Learn three easy ways to insert a horizontal line across the page in Microsoft Word. This tutorial covers the AutoFormat shortcut, the Borders button, and drawing lines with Shapes, plus how to customize line styles, colors, and thickness for professional-looking documents.
How to Remove the Thick Black Line (Horizontal Line) in Word
Learn how to remove the thick black line that sometimes appears in Microsoft Word after pressing Enter. This tutorial explains why it happens, how to remove it using paragraph borders, how to prevent it from happening again, and includes a quick reference guide for Word’s automatic line styles.
Stay Updated
There are two easy ways to get notified when new tutorials are published:
Subscribe on YouTube for new video tutorials: @SimpleSoftwareTutorials
or enter your email below to receive new blog posts directly in your inbox:

