
If you’ve had the same Gmail account for years, there’s a good chance you have a large backlog of old promotional emails you no longer need.
Rather than deleting everything before a certain date, this method gives you a more targeted way to clean up your inbox. By combining Gmail search operators with sender-based filtering, you can find older promotional messages, review who they came from, and then bulk delete emails from senders you’re comfortable removing.
It may not be the fastest possible way to clean out Gmail, but it gives you more control over what gets deleted and can be a practical way to work through years of newsletters, retail emails, mailing lists, and other promotional messages.
What You’ll Learn
- How to find old promotional emails using Gmail search operators
- How to narrow results to messages from a specific sender
- How to select all matching emails, including messages across multiple pages
- How to bulk delete old promotional emails
- How to permanently remove deleted messages from Trash when you’re ready
Video Tutorial
Breaking Down the Search
A search operator is a special command you can type into Gmail’s search box to narrow down your results. Instead of searching for a word or sender, search operators let you tell Gmail exactly what type of messages you want to find.
For this cleanup method, I use:
category:promotions older_than:10y
Here’s what each part means:
category:promotionstells Gmail to show messages it has categorized as Promotions.older_than:10ytells Gmail to show messages that are more than 10 years old.- When you use both together, Gmail looks for messages that match both conditions – in this case, promotional emails that are more than 10 years old.
You can change the time period to fit your own inbox. For example, older_than:5y would show promotional emails more than five years old, while older_than:1y would show messages more than one year old.
Search operators can be combined in many different ways, which makes them especially useful for targeted Gmail cleanup.
Step-by-Step Instructions
Start from your Gmail inbox and follow the below instructions to learn this easy method of deleting old promotional emails from Gmail.
Step 1: Search for Old Promotional Messages
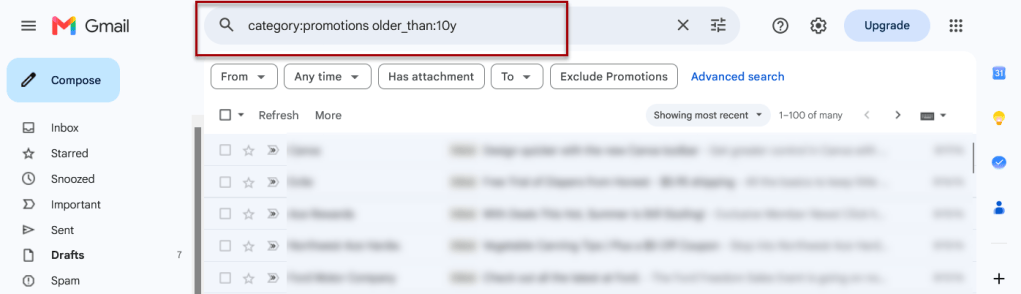
Type a Gmail search operator in the search box at the top of the screen.
For example:
category:promotions older_than:10y
This will filter emails labeled as promotions (category) that you received at least 10 years ago. Depending on how old your emails are, you may want to adjust the date range. For example, change 10y to 5y to decrease the search from older than 10 years to older than 5 years.
I originally started with category:promotions older_than:15y since I had emails dating back to 2009 and earlier!
Step 2: Open a Message and Filter
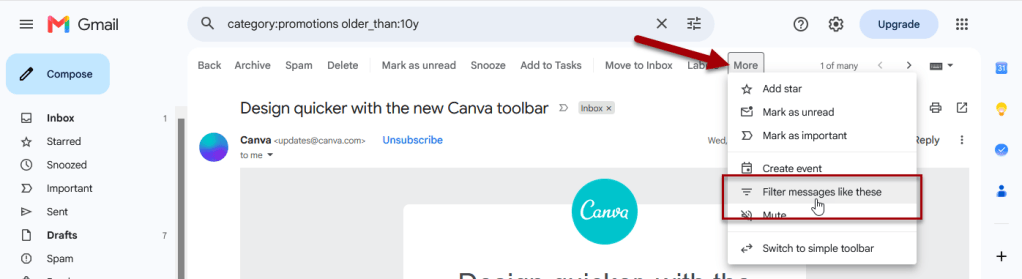
- Open a message from the search results, then click to open one.
- Then click on More > Filter messages like these
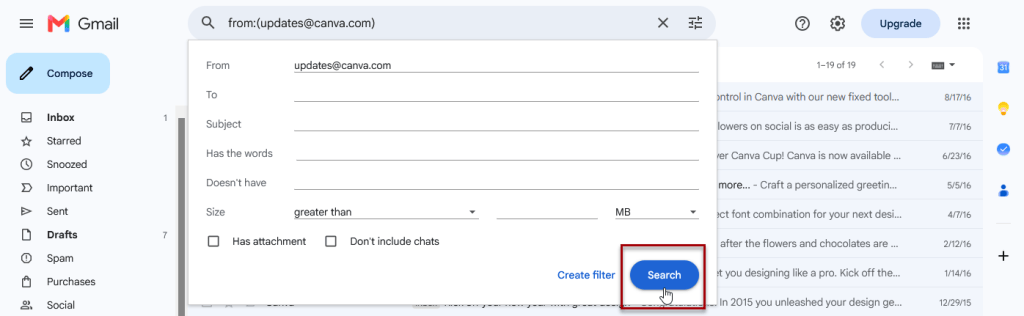
- Then click the blue Search button
This typically filters the messages by email address or the email list the sender used.
Step 3: Review the Messages
Before deleting any messages, it’s a good idea to scroll through and review to ensure you don’t accidentally delete a message you want to keep. If there are any you want to keep, those emails can be de-selected in the next step so you don’t delete them. They will also be stored in your trash for 30 days before deletion or until you manually empty your trash.
Step 4: Select and Delete the Messages
Click the Select checkbox to select all messages.
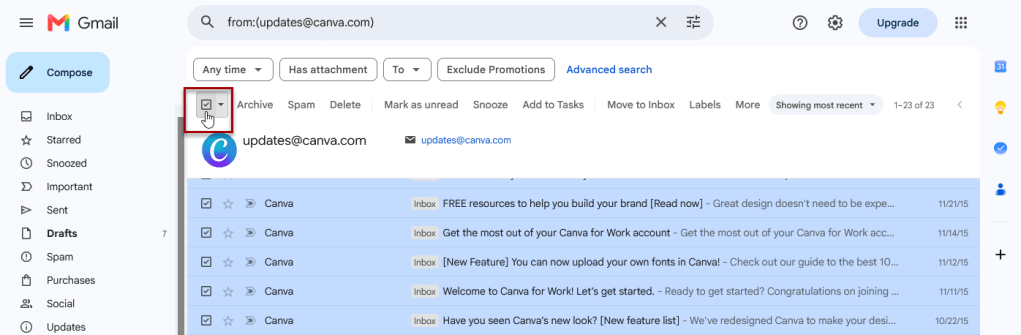
If there are more emails than what is shown on the page, click Select all conversations that match this search to select all of the messages. If you’d like to review the messages not shown on this page, do not click this so you can review those messages once the emails on this page are deleted.

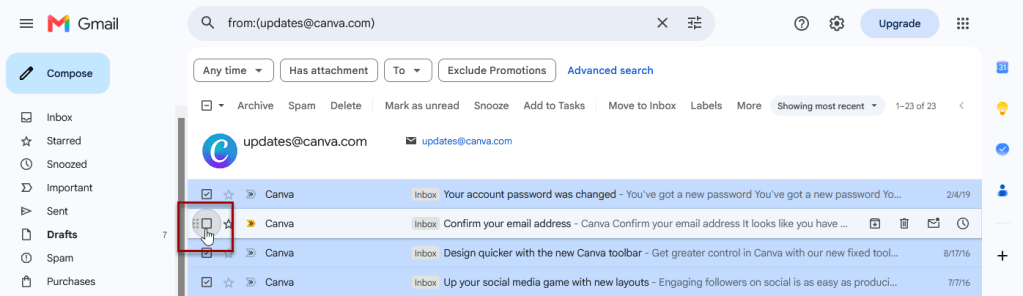
Uncheck the box next to any emails you want to keep.
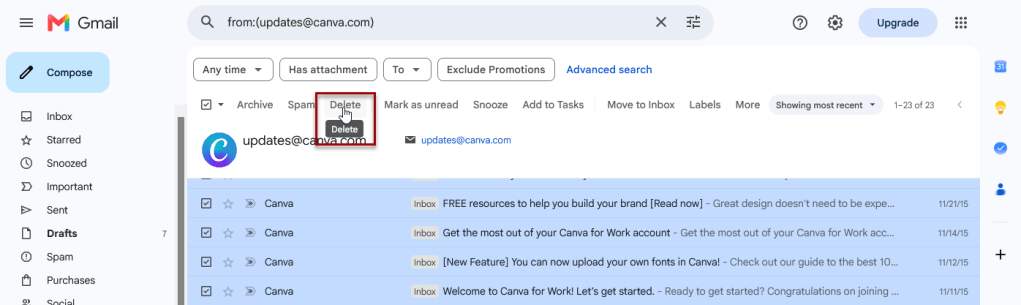
Click the Delete button
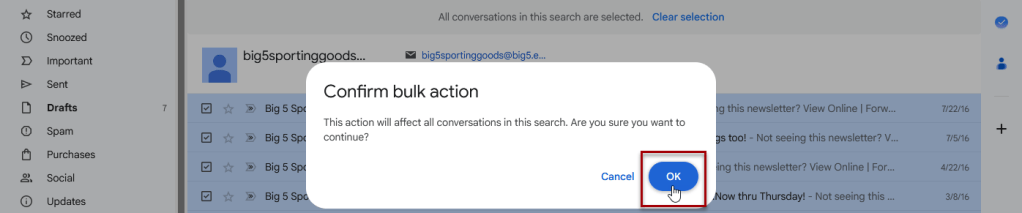
Click OK to confirm you want to delete all these emails.
If there are a lot of messages to delete, you may see notice that emails become deselected and a notification will show on the bottom left. You can either choose to wait on this screen until the messages have all been deleted, or you can leave this page.

If you choose to wait until the messages are all deleted, the page will display a message confirming that no messages match your search.
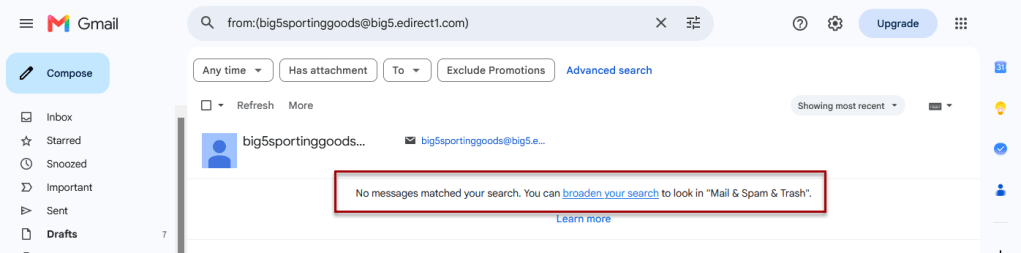
Step 5: Repeat and Delete
Repeat these steps to delete as many emails from your Gmail inbox as you desire.
Step 6: Empty Your Trash (Optional)
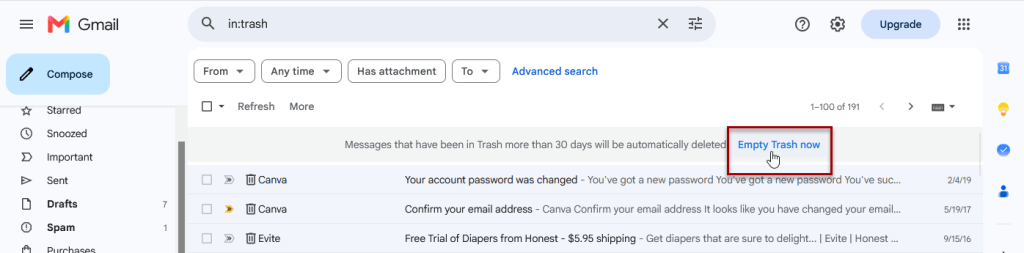
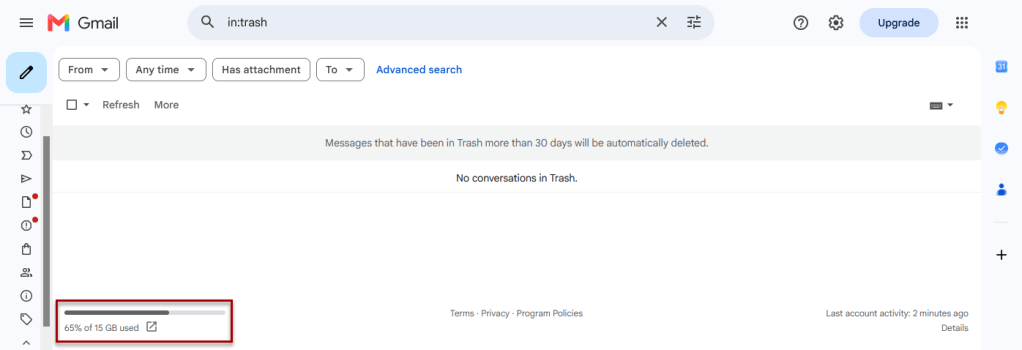
Messages that have been in Trash more than 30 days will be automatically deleted, but you can always delete them sooner to clear up storage space.
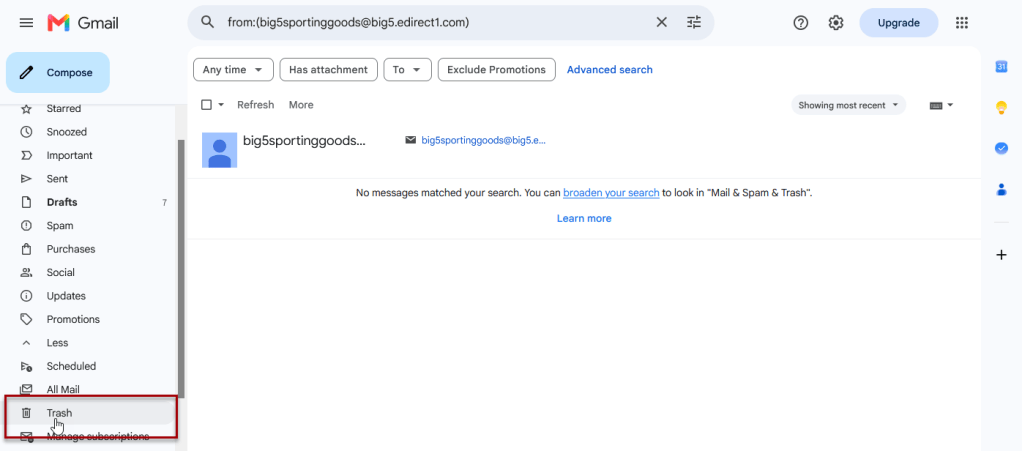
Click on Trash in the left-side menu (you may need to click on more to find it).
Click on Empty trash now.
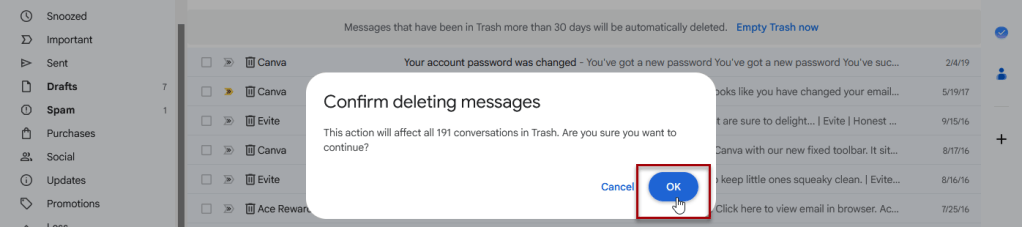
Click OK to confirm deleting the emails.
Now your Gmail has less clutter! At the bottom of the trash page, you can see how much of your storage space is being used.
Learn Other Ways to Clean Up Gmail
Check out this post for more Gmail cleanup tips and tricks!

Gmail Inbox Cleanup Tips & Tricks
Clean up and organize your Gmail inbox with practical tips for bulk deleting old messages, using search operators, protecting important emails, creating filters and labels, managing Gmail categories, and adjusting inbox settings. This guide includes step-by-step instructions, screenshots, and examples to help you reduce clutter and stay organized.
Related

How to Schedule an Email in Gmail
Learn how to schedule an email in Gmail so your message is sent at the right time. This tutorial covers how to schedule, view, cancel, and reschedule emails on desktop and mobile, plus practical uses, scheduling limits, time zone considerations, and other helpful tips.
How to Label Emails From a Specific Date Range in Gmail
Learn how to find Gmail emails from a specific date range using after: and before: search operators, then create and apply a label to organize those messages for easy access later. This tutorial also includes practical copy-and-paste date range examples for years, months, projects, travel, taxes, and more.
Stay Updated
There are two easy ways to get notified when new tutorials are published:
Subscribe on YouTube for new video tutorials: @SimpleSoftwareTutorials
or enter your email below to receive new blog posts directly in your inbox:

