
If you’re receiving unwanted messages from a specific email address, Gmail gives you a couple of ways to keep those emails out of your Inbox.
In this tutorial, I’ll show you how to block a sender directly from one of their emails, as well as how to create a Gmail filter that automatically sends messages from a specific email address to the Trash. I’ll also show you how to unblock a sender later, either from an existing message or through Gmail’s settings.
At the end, I’ll also explain when it may be better to unsubscribe from a mailing list instead of blocking the sender entirely.
Video Tutorial
Step-by-Step Instructions
Below are two options to block a sender or unblock a sender, either by using Gmail’s built-in block or filtering features.
Option 1: Block or Unblock a Sender in Gmail
This section covers Gmail’s built-in Block feature. You can block someone directly from one of their emails, which sends future messages from that address to Spam. If you change your mind, you can unblock them either from one of their messages or from Settings > Filters and Blocked Addresses.lock or Unblock a Sender in Gmail
Blocking a Sender From an Email
This option will send any future emails from this sender to your Spam folder.
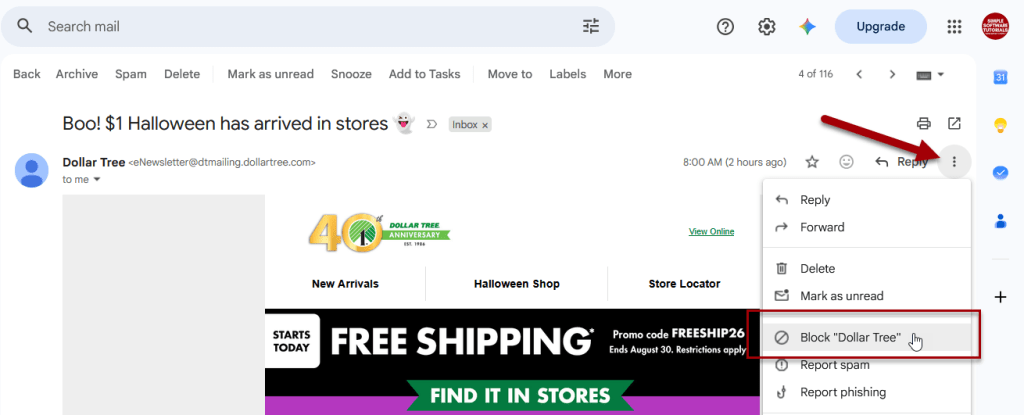
1. Open the email from the sender you want to block, click the three vertical dots (More options) in the top-right corner next to the reply button, then click Block “[Sender Name]”.
2. Click Block again in the pop-up window to confirm.
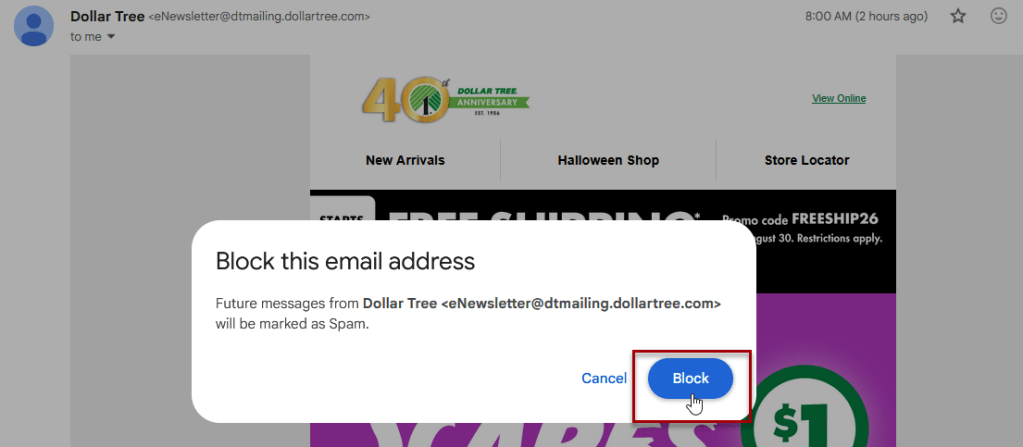
Future emails from that sender will automatically go straight to your Spam folder.
Unblocking a Sender From an Email
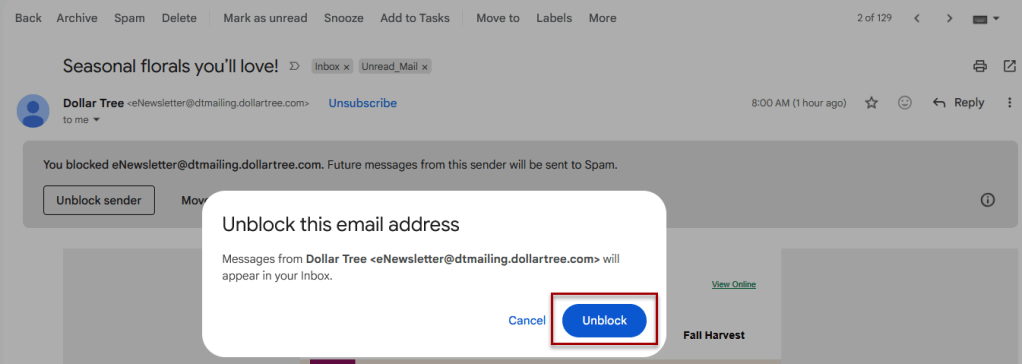
Open an email from the blocked sender and click the gray banner at the top of the message that says Unblock sender.
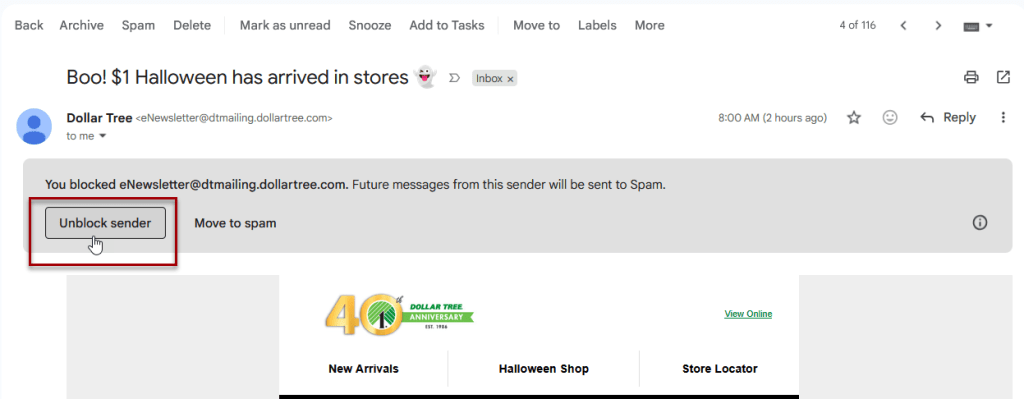
Click the blue Unblock button to confirm.
Unblocking a Sender Through Gmail Settings
This is a great option if you don’t have any emails from this sender, or if you want to view and manage all blocked senders.
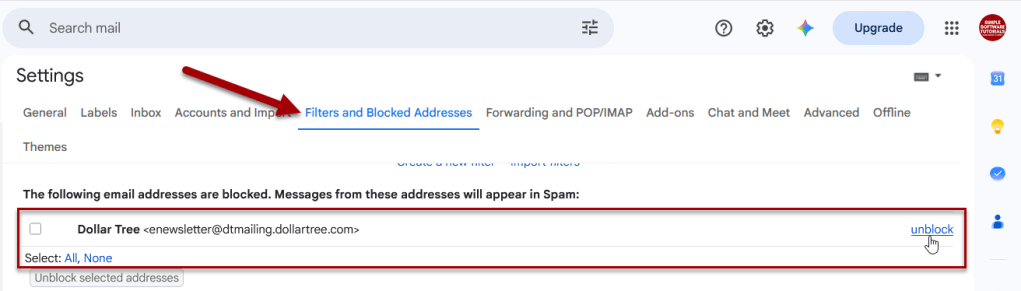
Go to Settings (gear icon) > See all settings > Filters and Blocked Addresses to manage your entire blocked list.

To unblock:
- Locate the sender and click unblock
- or
- Click the checkbox(es) next to the sender(s) you want to unblock, then click unblock selected addresses
Option 2: Automatically Delete Emails From a Sender With a Filter
This section covers a different approach: creating a Gmail filter that automatically sends future messages from a specific email address to Trash. If you no longer want Gmail to delete those messages, you can return to Settings > Filters and Blocked Addresses and delete the filter.
“Blocking” a Sender Using Their Email Address + Filter
Gmail does not have a manual “Add to Blocked List” option. However, you can achieve a similar result by creating a custom filter rule using their email address to automatically send their messages to the Trash.
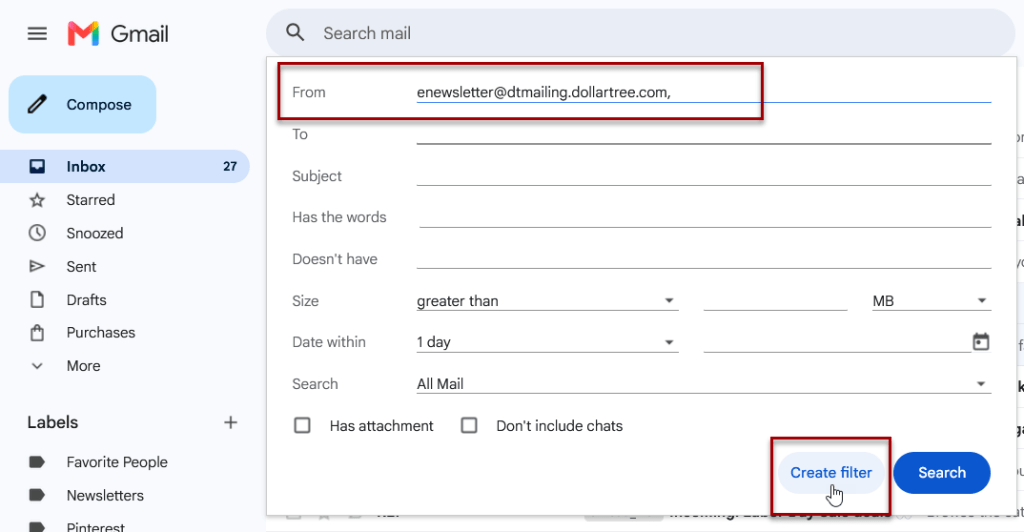
1. Click on the Show search options icon in the search box.

2. Enter the email address in the From field, then click Create filter.
3. Check the box for Delete it and you can also apply the filter to any matching conversations, if applicable. Then click Create filter.
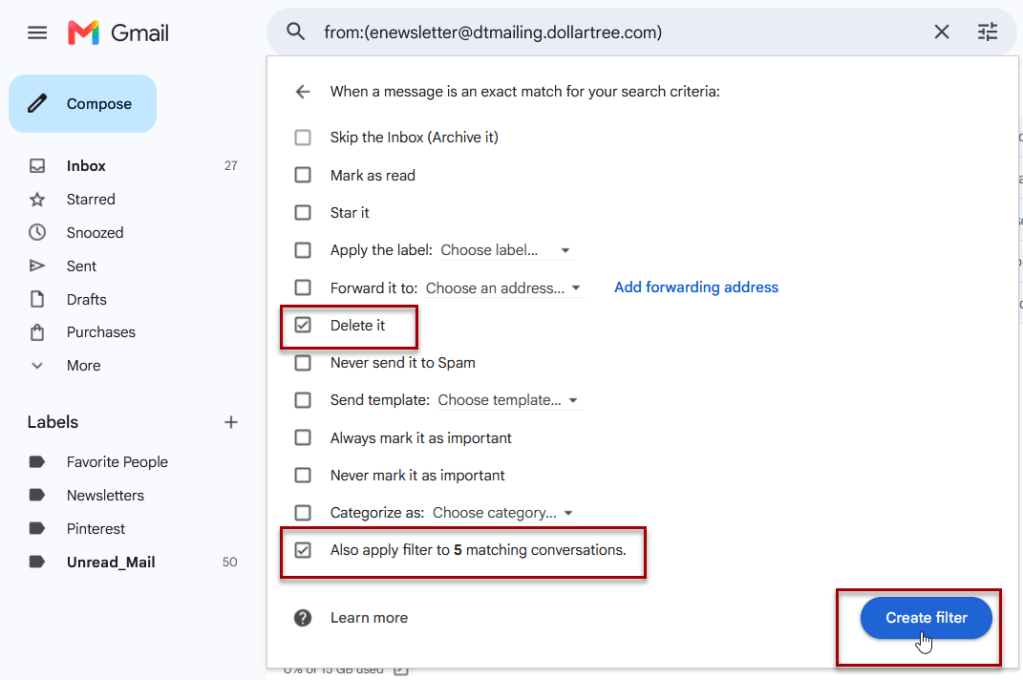
Any future email from that specific address will now bypass your Inbox and go straight to the Trash folder without you ever seeing it.
Removing the Filter
This filter that automatically deletes emails from a specific email address can be deleted in Gmail settings.
1. Click on the Settings icon then click on See all settings.
2. Click on the Filters and Blocked Addresses tab, locate the filter from the filters list, then click delete.
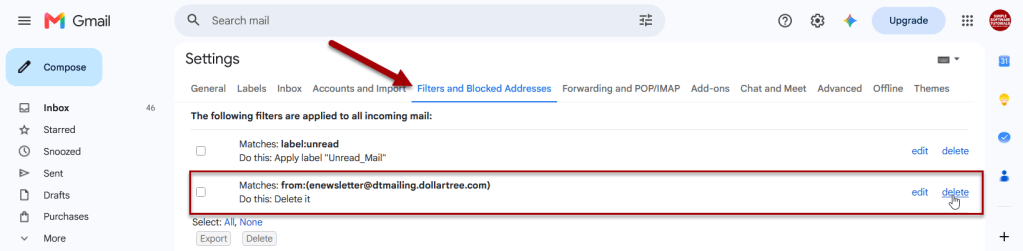
3. Click the blue OK button to confirm deleting the filter.
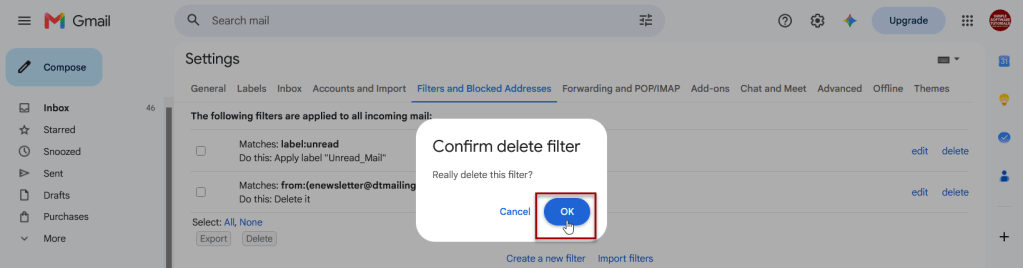
The filter will now be deleted and messages from this sender will no longer immediately be deleted and will be sent to your inbox instead.
Additional Tips
Need to unsubscribe from a mailing list?
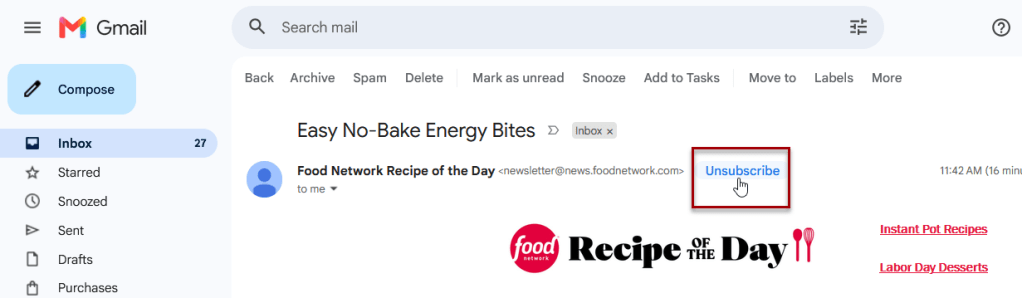
If you want to stop getting emails from an automated mailing list without blocking the sender entirely, you can use Gmail’s built-in Unsubscribe button instead:
- Open an email from that sender
- Click the unsubscribe button next to the sender’s email address
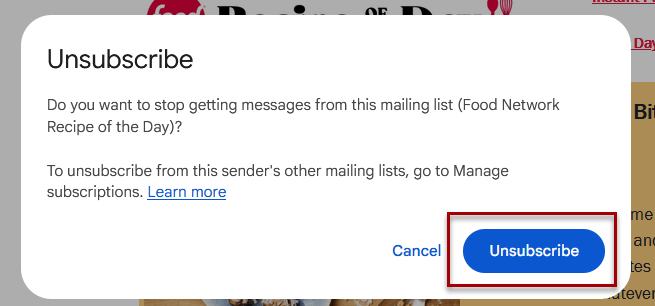
- Click Unsubscribe again in the pop-up window to confirm.
Note: If you do not see the unsubscribe option, there could be a couple reasons for it:
- The ability to manage email subscriptions is gradually rolling out and may not be available to you yet.
- Gmail only displays its automated Unsubscribe button when an email includes a specific hidden code called a List-Unsubscribe header and when Gmail’s automated filters trust the sender.
If the unsubscribe option is not available for the email you want to unsubscribe from, the sender should have included an unsubscribe link toward the bottom of the email message.

Related

How to Schedule an Email in Gmail
Learn how to schedule an email in Gmail so your message is sent at the right time. This tutorial covers how to schedule, view, cancel, and reschedule emails on desktop and mobile, plus practical uses, scheduling limits, time zone considerations, and other helpful tips.
How to Label Emails From a Specific Date Range in Gmail
Learn how to find Gmail emails from a specific date range using after: and before: search operators, then create and apply a label to organize those messages for easy access later. This tutorial also includes practical copy-and-paste date range examples for years, months, projects, travel, taxes, and more.
Stay Updated
There are two easy ways to get notified when new tutorials are published:
Subscribe on YouTube for new video tutorials: @SimpleSoftwareTutorials
or enter your email below to receive new blog posts directly in your inbox:

