
If your Gmail inbox has filled up with messages from the same sender, you don’t have to find and manage each email individually. Gmail makes it easy to find all messages from a particular sender at once so you can decide what you want to do with them.
You might want to delete old emails you no longer need, organize related messages with a label, or create a filter that automatically handles future emails from that sender.
In this tutorial, I’ll show you how to find emails from a specific sender, select and delete multiple messages, and create a Gmail filter to automatically organize future emails. I’ll also explain the difference between filters and labels, share some common ways you can use them, and provide both a video walkthrough and step-by-step written instructions.
Common Uses
Filters and labels are useful anywhere someone gets recurring email that they want to organize automatically rather than sort by hand. For example:
- Family or friends
- Online orders and shipping updates
- Bills and payment confirmations
- Receipts and purchase confirmations
- Bank or credit card notifications
- Subscription renewal notices
- Travel confirmations
- Airline, hotel, or rental car emails
- Medical appointment reminders
- School or daycare messages
- Volunteer organizations
- Clubs, churches, or community groups
- Newsletters
- Promotions and coupons
- Social media notifications
- Job search emails
- Job alerts from LinkedIn, Indeed, etc.
- Recruiter messages
- Application confirmations
- Interview scheduling emails
- Work emails from a specific client
- Messages from a manager or team
- Project-specific emails
- Vendor or supplier communication
- Invoices
- Customer support messages
- Event registrations
- Webinar confirmations
- Software notifications
- Security alerts
- Automated reports
- Website contact form submissions
- Comments or notifications from a blog or website
- Emails containing attachments you want to find easily
- Messages related to taxes or financial records
- Warranty or product registration information
There are also a few different ways filters can be used beyond simply applying a label. For example, a filter can automatically:
- Apply a label
- Skip the Inbox so the message is filed without cluttering the inbox
- Mark messages as read
- Star important messages
- Forward certain messages
- Delete unwanted messages
- Categorize messages based on sender, subject, or keywords
Video Tutorial
Gmail Labels vs Filters
In Gmail, labels and filters are related, but they do different jobs:
- A label is an organizational tag you apply to emails. It helps you group and find messages later. For example, you might create labels called Orders, Bills, Family, or Job Search.
- A filter is a rule that tells Gmail what to do when an email matches certain criteria. For example, you can create a filter that says: “When an email comes from this sender, apply the Orders label and skip the Inbox.”
So the simplest way to think about it is: Labels organize emails. Filters automate what happens to emails.
They often work together. You can manually add a label to existing messages, but if you want Gmail to automatically label future messages from a particular sender, with a certain subject, or containing certain words, you create a filter.
One important Gmail distinction is that labels are not quite the same as traditional folders. A single email can have more than one label, while a file in a traditional folder system usually lives in just one folder. An email can also have a label while still appearing in your Inbox.
For example, you could have:
Email from your electric company
→ Label: Bills
→ Still appears in Inbox
Or you could create a filter that says:
If sender = electric company
→ Apply Bills label
→ Skip the Inbox
In that case, the email is still in Gmail and accessible under the Bills label, but it doesn’t clutter your main Inbox.
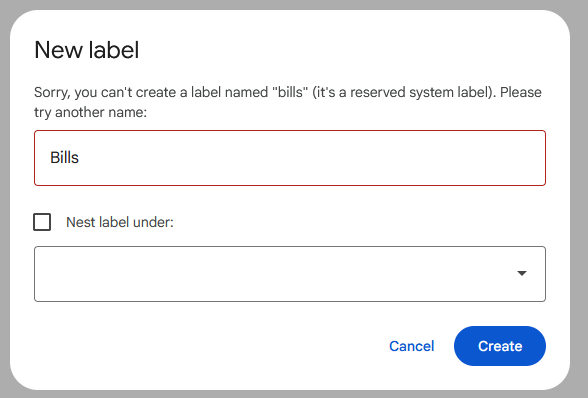
Note: Gmail reserves certain label names for its own system features. If Gmail tells you a label name is “a reserved system label”, choose a slightly more specific name instead – for example, Monthly Bills rather than Bills.
Step-by-Step Instructions
For these instructions, I’m starting from the Inbox or All Mail in Gmail.
Step 1: Filtering all messages from a sender
First we need to find an email from the sender. There are a couple options:
- Start typing the sender’s name or email address in the search box
- Scroll through your inbox to find an email from the sender
Once you’ve found an email from the sender:
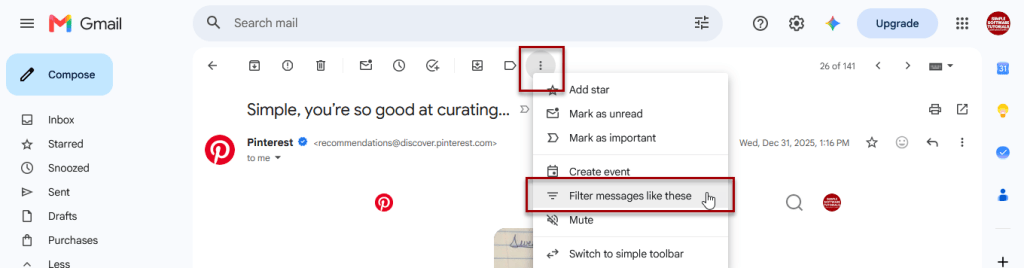
- Open any email from the sender by clicking on it or check the box next to the message
- Click on the 3 dots to open the more menu
- Click on Filter messages like these
Next Step
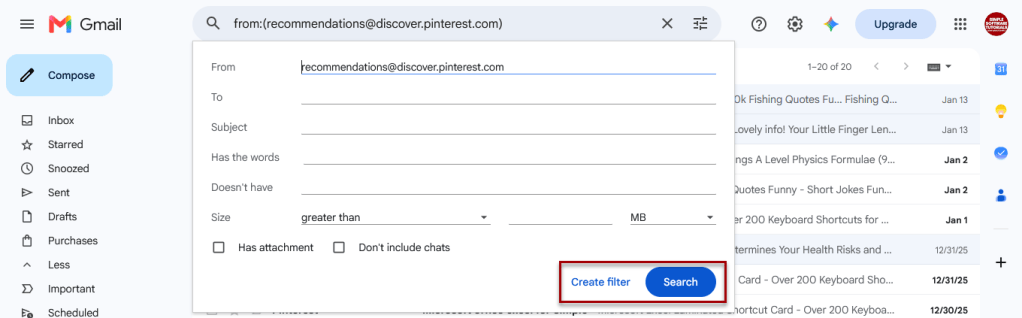
- Delete: If you want to simply delete these emails, click search and go to step 2
- Label: If you want to label and filter these emails, click Create filter and go to step 3
Step 2: Deleting all emails from a sender
To delete all the emails from a sender, we just need to select all of their emails and delete;
- Click the checkbox to select all of the messages
- Click on the trashcan icon to delete
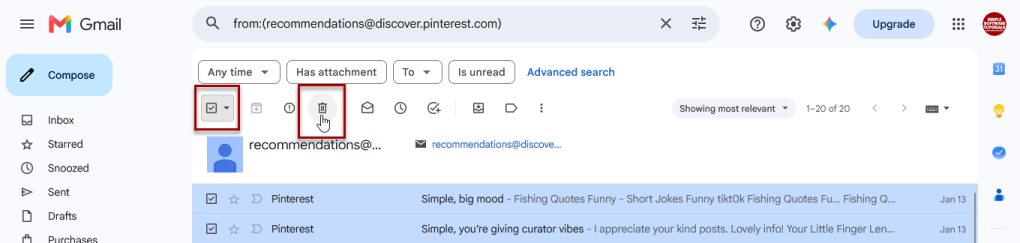
The messages will now be moved to your Trash folder.
To Undo Deleting Messages
If this was done in error the messages can be moved back to the inbox:
- Click on Undo in the brief confirmation message
- Click on the Trash label in your left-side navigation
- Find the messages following the instructions in step one
- Click the checkbox to select all the messages
- Click on the move to inbox icon


Step 3: Creating automatic labels and filtering
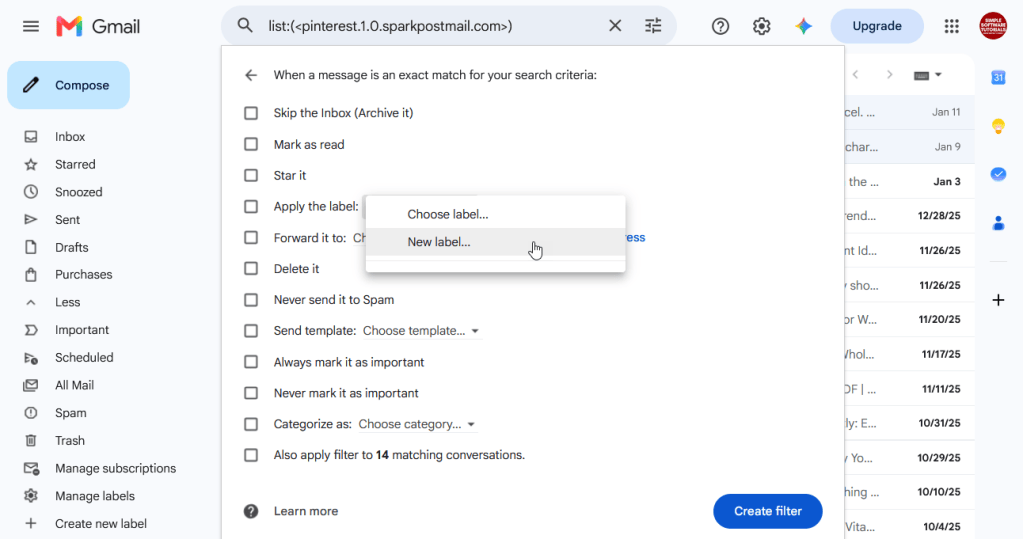
To automatically label messages upon receipt and choose what happens when messages arrive:
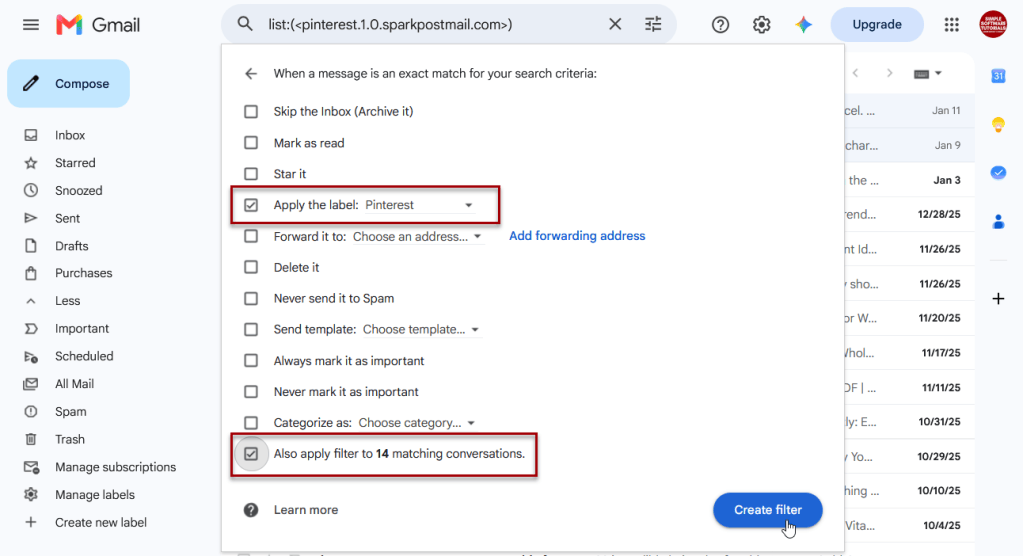
- Review the filtering options and check any that should be applied to the messages
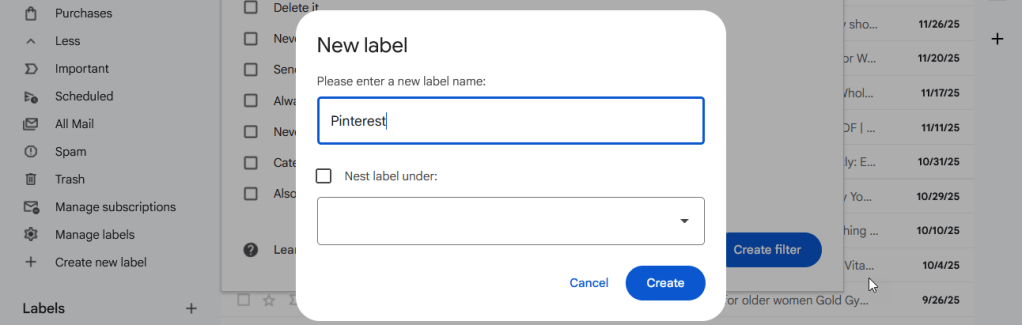
- Create a label, if desired:
- Click Choose label > New label
- Enter a name for the label
- Click Create
- Be sure to click the last option Also apply filter to matching conversations – that will ensure all current messages are filtered/labeled based on these rules
- Click Create filter
Related

How to Schedule an Email in Gmail
Learn how to schedule an email in Gmail so your message is sent at the right time. This tutorial covers how to schedule, view, cancel, and reschedule emails on desktop and mobile, plus practical uses, scheduling limits, time zone considerations, and other helpful tips.
How to Label Emails From a Specific Date Range in Gmail
Learn how to find Gmail emails from a specific date range using after: and before: search operators, then create and apply a label to organize those messages for easy access later. This tutorial also includes practical copy-and-paste date range examples for years, months, projects, travel, taxes, and more.
Stay Updated
There are two easy ways to get notified when new tutorials are published:
Subscribe on YouTube for new video tutorials: @SimpleSoftwareTutorials
or enter your email below to receive new blog posts directly in your inbox:

